Colorful 3D Rainbow SVG Design
At first glance, a colorful 3D rainbow SVG design seems straightforward enough. You might imagine a simple arc of bright colors, perhaps with a slight shadow or gradient to give it depth. But if you have spent any time searching for or working with these files, you know that the reality can be far more complicated. The difference between a design that looks flat and amateurish and one that truly pops off the screen or page often comes down to understanding what makes a 3D rainbow SVG actually work. Many people pick up files or create their own without realizing that small technical and artistic choices can completely change the final result. Let's walk through what a colorful 3D rainbow SVG design really is, why it deserves more attention to detail, and how you can avoid the most common pitfalls that trip up everyone from casual hobbyists to seasoned professionals.
What a Colorful 3D Rainbow SVG Design Actually Does
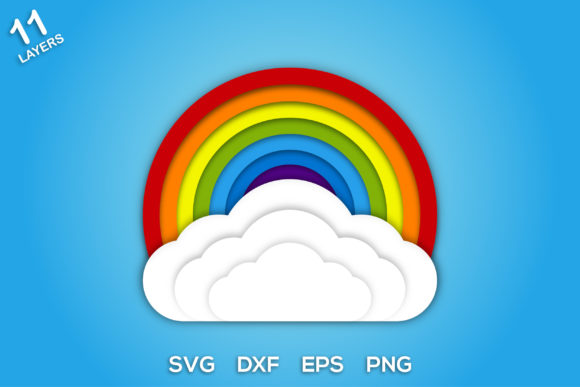
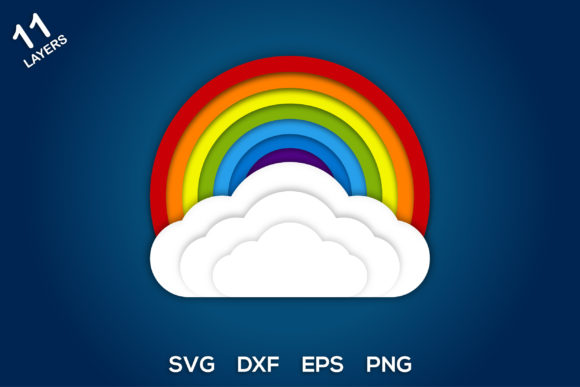
A colorful 3D rainbow SVG design is essentially a scalable vector graphic that uses gradients, layering, shading, and sometimes overlapping paths to create the illusion that a rainbow has volume, depth, and dimension. Unlike a flat rainbow with simple bands of color, a 3D version attempts to make the bands look rounded, overlapping, or illuminated from a light source. This effect can be used in logos, stickers, website illustrations, print materials, social media graphics, and even physical products like t-shirts or mugs. The appeal is obvious: a well-executed 3D rainbow feels lively, modern, and eye-catching. The challenge is that achieving that look in an SVG file requires a careful balance of color theory, path construction, and rendering logic.
People are drawn to these designs because they want something that stands out. Whether you are designing a brand identity for a LGBTQ+ friendly business, creating educational materials for kids, or adding a playful element to a blog header, the 3D rainbow can communicate joy, inclusivity, and creativity. But if the design is poorly constructed, it can just as easily communicate sloppiness, confusion, or a lack of polish. The goal is to get the wow factor without the technical headaches.
Relying on Simple Gradients That Look Flat
One of the most frequent mistakes people make when working with colorful 3D rainbow SVG designs is assuming that a linear gradient applied to each band of the rainbow is enough to create a 3D effect. In reality, a linear gradient that shifts from one color to another without any consideration of light and shadow often looks like a flat ribbon that has been smeared. It lacks the rounded, volumetric feel that makes a 3D rainbow convincing.
To get a true 3D look, you need to think about where the light hits each band. A better approach is to use radial gradients or multiple overlapping gradients that simulate a cylindrical or tubular shape. For example, instead of a solid red band with a simple gradient from dark red to light red, you can create a band that has a highlight near the top, a mid-tone in the center, and a darker shadow at the bottom. This mimics how light wraps around a curved surface. Many professional designers achieve this by stacking multiple paths with different gradient settings, or by using SVG filters that add specular highlights and shadows. If you are downloading a pre-made design, look for files that mention "dimensional," "volumetric," or "realistic" gradients rather than just "3D."
Overcomplicating the Path Structure
Another common issue is overcomplicating the SVG path data. Some designers try to create a 3D effect by using dozens of tiny overlapping shapes, which can make the file bloated and difficult to edit. More importantly, a messy path structure can cause rendering problems in different browsers or cutting machines. If you are using the design for a Cricut or Silhouette project, for instance, a huge number of overlapping nodes can make the machine cut incorrectly or take forever to process.
The better approach is to use clean, minimal paths that define each band of the rainbow as a single continuous shape, then layer them with careful z-index ordering. If you are creating your own design, use the Pen tool or shape primitives to draw each band as a closed path, and then apply gradients within that single path. Avoid using too many anchor points. For downloaded files, check the node count if you have editing software. A well-constructed 3D rainbow SVG should have each band represented by a smooth, flowing path with no more than a dozen or so nodes per band. This keeps the file lightweight, easy to edit, and reliable across different software.
Ignoring the Order of Colors and Overlap
A colorful 3D rainbow SVG design relies on the illusion that one band sits in front of or behind another. If the overlapping order is wrong, the entire effect collapses. A classic mistake is to place the bands in the wrong z-order, so that a darker color appears to float on top of a lighter one when it should be the opposite. For a rainbow that curves upward, the red band is usually at the top and violet at the bottom, but when you add 3D depth, the bands need to cast shadows on the band below them. If you simply stack them in rainbow order without adjusting for a light source, the result looks like a stack of flat tiles rather than a cohesive 3D object.
To fix this, decide on a light source direction early. If the light comes from the top left, then the shadow of each band should fall to the bottom right of the band above it. This means you might need to add a subtle shadow path or use a dark gradient at the bottom edge of each band to simulate the shadow cast onto the band below. Alternatively, you can use a drop shadow filter that applies only to the bottom edge. When you preview the design, zoom in and check whether the overlaps look natural. If a band looks like it is floating without casting any shadow on its neighbor, you have a problem.
Choosing Colors That Clash or Lose Saturation
Rainbows are inherently colorful, but not all colors work well together when you add 3D shading. A mistake that even experienced designers make is using fully saturated colors for every band, then adding a dark shadow or bright highlight that pushes the color into an ugly or muddy range. For example, a bright yellow band with a dark gray shadow can turn into an unpleasant olive or brown. Similarly, a vibrant blue with a white highlight can look washed out.
The remedy is to choose a palette that has enough room for shading. Start with colors that are slightly less saturated than the brightest version you want, so that when you add a highlight, the color still looks rich. Use a color picker and manually select a darker version of the same hue for shadows, not a neutral gray. For instance, if your red band is #FF3333, use #990000 for the shadow area rather than a gray like #666666. This keeps the 3D effect colorful and harmonious. Also, consider using a unified lighting color across all bands. If the light source is warm, all highlights can have a slight yellow tint. If the light source is cool, add a touch of blue to the highlights. This consistency ties the design together.
What to Check Before You Download or Buy
If you are purchasing or downloading a colorful 3D rainbow SVG design, there are a few things you should verify before you commit. First, check the file format and compatibility. Some designers claim their files are SVG but actually include embedded raster images or complex filters that do not render properly in all software. Open the file in a text editor or a free SVG viewer to see if the paths are clean and the gradients are defined using standard SVG elements like linearGradient or radialGradient. If you see
Second, look at the preview images carefully. Many sellers show a beautifully rendered 3D rainbow in their preview, but the actual SVG file might look different when opened in your design software. Request a screenshot of the file opened in a standard program like Inkscape or Illustrator if possible. Third, read the license terms. Some free downloads are only for personal use, and if you plan to use the design for a client project or merchandise, you need a commercial license. Fourth, consider whether the design is scalable without loss. A true SVG should look crisp at any size, but if the 3D effect relies on pixel-based textures or complex filters, it may degrade when scaled. Ask the seller if the design retains its 3D appearance at large sizes.
Practical Advice for Better Results
If you are creating your own colorful 3D rainbow SVG design, start with a reference. Look at real cylindrical objects under a single light source and notice how the highlight runs along the top edge, the mid-tone covers the middle, and the shadow gathers at the bottom. Apply that same logic to each band of the rainbow. Use a vector editor that supports gradient mesh or multiple gradient stops so you have fine control. Alternatively, you can achieve a convincing 3D look by stacking two copies of each band: one for the base color and one slightly offset for the shadow, then use a blending mode like multiply or overlay. Experiment with opacity and blur to soften transitions.
For those using the design in a physical product, such as a vinyl decal or a heat transfer, remember that the 3D effect may need to be simplified. Cutting machines cannot replicate complex gradients, so you may need to convert the 3D look into a series of layered solid colors. In that case, a 3D rainbow design that uses multiple overlapping bands of different shades can still work beautifully, but you need to plan the layers carefully so that they align properly when applied. Test the design by printing or cutting a small sample first.
Another practical tip is to always save a copy of your SVG without any filters or effects that might not be supported. Some SVG editors add proprietary tags that work only within that software. Before sharing or uploading, use a validator tool to check that the file is standard SVG. This prevents unpleasant surprises when someone opens the file in a different program.
Getting the Most Out of Your 3D Rainbow Design
A colorful 3D rainbow SVG design can be a versatile asset if you treat it with the same care you would give any other complex graphic. Whether you are using it for branding, decoration, or digital art, the key is to think about how the 3D effect will hold up in different contexts. A design that looks amazing on a white background might lose its depth on a busy patterned background. Test it against dark and light backgrounds, adjust the shadow opacity if needed, and consider adding a subtle stroke or outline to help the bands stand out.
Also, don't overlook the emotional impact of a well-made 3D rainbow. It can signal joy, pride, creativity, and inclusivity. That emotional weight means the design should be executed with precision. A sloppy or poorly shaded rainbow can feel like an afterthought, while a carefully crafted one can become a memorable part of your visual identity. If you are hiring a designer, ask them specifically about how they handle gradients and overlap for 3D effects. A good designer will have a clear workflow and be able to explain their choices.
Finally, keep learning. The world of SVG design is constantly evolving, and new tools make it easier to create realistic 3D effects without bloated files. Experiment with SVG filters like feDropShadow, feGaussianBlur, and feSpecularLighting to add realistic lighting. These filters can transform a flat rainbow into something that looks almost tangible. Just be sure to test them across different browsers, because some older versions do not support advanced SVG filters. In that case, fall back to gradient-based shading, which works universally.
The difference between a mediocre colorful 3D rainbow SVG design and an exceptional one is rarely about talent. It is about understanding the mechanics of light, color, and path construction. Avoid the common mistakes, check the details before you commit, and apply practical shading techniques. You will end up with a design that not only looks great but also performs reliably across all your projects. That is the kind of result that keeps people coming back to your work, whether you are a creator, a business owner, or just someone who loves making things look beautiful.