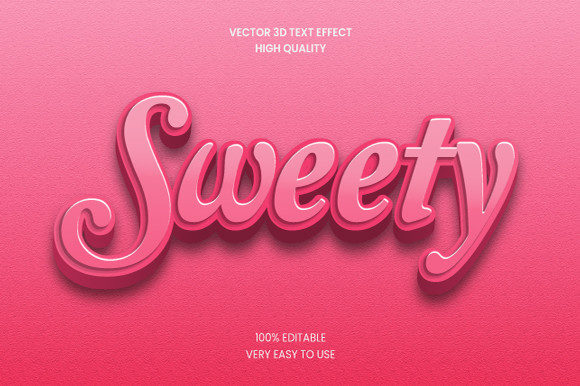
Sweety 3D Text Effect Mockup Graphic: A Practical Workflow Asset for Designers and Content Creators
When you work with visual content daily, you quickly learn that the difference between a good design and a great one often comes down to depth. Flat text communicates information, but dimensional text conveys presence. The Sweety 3D Text Effect Mockup Graphic fits into this exact gap. It is not merely a decorative overlay; it is a structured design asset that allows you to produce three-dimensional typography with a soft, candy-like aesthetic without constructing the effect from scratch. For professionals who value speed without sacrificing polish, understanding how to integrate such a tool into an existing workflow matters more than the flash of the result itself.
What the Sweety 3D Text Effect Mockup Graphic Actually Is
At its core, this mockup graphic is a pre-built, layered file—typically compatible with software like Adobe Photoshop, Affinity Photo, or similar layer-based editors. It provides a smart object layer where you insert your own text, and the mockup automatically applies a three-dimensional extrusion, highlights, shading, and a sweet, glossy surface treatment. Think of it as a shortcut through the technical labor of building bevels, setting up lighting angles, and matching reflections. The mockup does that heavy lifting so you can focus on message, context, and composition.
This asset lives in the category of text effect templates that behave predictably. Unlike a filter or a one-click action, a mockup graphic gives you control over placement, scale, and color within a structured environment. It is a resource you slot into your project at a specific point in the process, and it interacts with your typography choices, background decisions, and overall branding constraints.
Where It Fits in a Broader Creative Process
Every design project follows a rough arc: conceptualization, asset gathering, composition, refinement, and delivery. The Sweety 3D Text Effect Mockup Graphic belongs squarely in the composition and refinement stages. You do not reach for it during initial brainstorming. You load it after your copy is finalized, your layout grid is set, and you know the emotional tone your headline must carry.
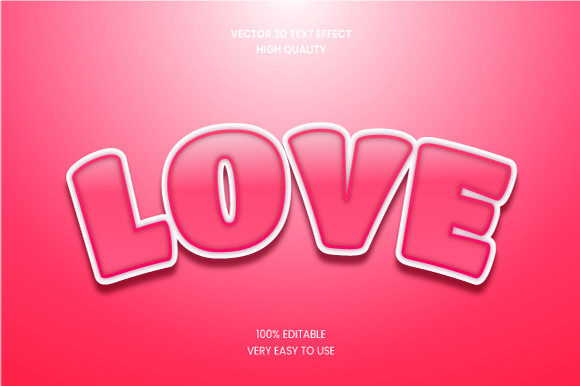
For example, a bakery launching a seasonal campaign for strawberry cupcakes might settle on the headline “Spring Sweetness.” The phrase is short, punchy, and benefits from visual weight. Placing that text through the Sweety mockup immediately gives it a confectionery feel that aligns with product photography. The workflow becomes: write copy, lock layout, open mockup, double-click smart object, paste text, save, and position. The entire text creation step compresses into minutes rather than an hour of manual layer work.
This asset also fits after other design decisions are made. If your background uses pastel gradients or soft bokeh photography, the glossy 3D effect complements without competing. If your layout already has heavy textures, you might choose to scale back the effect opacity or adjust blending modes. The mockup gives you a starting point that is visually complete but still editable, which means it behaves like a colleague who hands you a solid draft rather than a finished piece you cannot touch.
Integration with Other Tools, Platforms, and Methods
No design asset exists in isolation. The Sweety 3D Text Effect Mockup Graphic interacts with your software stack, your file management habits, and even your team communication practices.
Software Compatibility
Most mockups of this type ship in PSD format. If you work in Adobe Photoshop, integration is seamless. You simply open the file, locate the smart object layer, paste your text, and save. If you use Affinity Photo, you can open PSD files directly or convert the layer structure. For users of Canva or web-based tools, the mockup may require export to PNG or SVG before use, which adds a translation step. Knowing your primary editor determines whether the mockup is a direct fit or requires a bridge asset.
Typography and Font Pairing
The mockup performs best with display fonts that have moderate stroke width. Thin hairline fonts tend to lose definition in the 3D extrusion, while overly ornate scripts can become muddy. If you are pairing a 3D headline with a clean sans-serif body, test the contrast. The mockup’s internal shading and highlights assume certain letterform proportions, so you might need to adjust tracking or kerning inside the smart object before the effect reads well.
Color and Brand Consistency
A common misstep is treating the mockup’s default colors as final. Smart object mockups usually allow you to recolor the fill, extrusion, and highlight layers separately. For brand work, open the smart object and assign your brand’s primary hex values to the text surface. Keep the highlight layer at a lighter tint of the same hue for cohesion. This step ensures the final graphic feels intentional rather than applied generically.
Practical Implementation Tips for Real Workflows
Implementation is where most users either save time or waste it. The difference comes down to preparation and understanding the mockup’s editing boundaries.
- Name your smart object layers. If you use multiple instances of the mockup in one composite, rename each smart object after pasting your text. This prevents confusion when you need to edit one headline without affecting another.
- Test the effect on dark and light backgrounds. The Sweety mockup’s shading relies on a specific lighting angle. On very dark backgrounds, the shadows may merge with the background. On very light backgrounds, the highlights may wash out. Do a quick A/B test before committing to the final asset.
- Resize via transform on the parent layer, not the smart object. Scaling the smart object content independently can break the extrusion proportions. Instead, use free transform on the layer that contains the mockup group. This preserves the relative depth of the 3D effect.
- Keep a master file unedited. Duplicate the mockup file for each project. This way you always have the original structure to fall back to if an edit goes wrong or if you need to start over with different copy.
Preparing Your Project for Smooth Integration
Before you open the Sweety 3D Text Effect Mockup Graphic, take ten minutes to prepare the surrounding canvas. Set your document resolution to match the mockup’s native resolution—usually 300 dpi for print or 72 dpi for screen. If you force a low-resolution mockup into a high-resolution print file, the edges may appear soft. Conversely, a print-grade mockup in a web layout may be larger than necessary, slowing your file performance.
Also prepare your text in a plain document beforehand. Finalize spelling, capitalization, and line breaks. The mockup environment is not optimized for heavy editing, so entering the smart object with clean copy reduces back-and-forth. If you have multiple headlines, batch them into separate smart object instances rather than trying to edit one repeatedly.
Quality Control and Consistency Across Outputs
When you use a mockup graphic across multiple deliverables—say, a social media post, a website banner, and a product label—consistency matters. The Sweety mockup renders the 3D effect relative to the document size. If your social post is 1080 by 1080 pixels and your banner is 1920 by 600 pixels, the text scale will differ. Take a screenshot of the effect settings from your first file and replicate them manually in subsequent files rather than relying on memory.
For teams, store the mockup in a shared asset library with version control. If you update the mockup—for instance, a new release with improved shading—your team should know which version is current. A simple naming convention like “Sweety_3D_v2.psd” prevents confusion. This is especially important when multiple designers are producing cohesive campaign materials.
Check the mockup’s output at actual size before final export. Zoom to 100% and inspect the edges of the extrusion for aliasing or jaggedness. If the effect uses layer styles rather than rendered pixels, some anti-aliasing artifacts may appear at certain sizes. Adjust the document’s DPI or the mockup’s layer styles to smooth these out. Quality control at this stage prevents surprises when the client views the file on a large monitor or in print proof.
Long-Term Use and Asset Management
Design assets have a lifecycle. The Sweety 3D Text Effect Mockup Graphic, like any layered file, can become outdated if the software you use changes its smart object handling or layer style engine. To extend its useful life, save a flattened version of each project outputs as a reference. If you later need to recreate the effect in a newer version of your editor, you can match the look manually using the flattened image as a guide.
Also consider building a small library of variations. Duplicate the mockup and recolor it for your most-used brand palettes. Label these variants clearly. When a repeat client requests a new graphic, you can pull the pre-colored version instead of reassigning colors each time. This turns the mockup from a one-time tool into a reusable system component.
If you work with motion graphics, export the mockup as a layered PNG sequence or PSD frame. Some users animate 3D text by adjusting the lighting angle frame by frame inside the mockup. This is an advanced technique, but it demonstrates how a static asset can extend into video workflows when you think about its structure rather than its default output.
Real Scenario: A Small Business Owner’s Weekly Social Media
Consider a small bakery owner who handles their own marketing. They have a consistent aesthetic: warm tones, rustic textures, and product photos taken with natural light. Their weekly Instagram posts include a promotion for a featured flavor. Using the Sweety 3D Text Effect Mockup Graphic, they prepare a template file that already includes their logo area, a photo placeholder, and the mockup smart object. Each week, they duplicate the template, insert the new photo, and paste the week’s flavor name into the smart object. The 3D effect remains consistent, the brand colors stay intact, and the posting schedule moves from two hours to thirty minutes. The mockup here is not a decoration; it is an efficiency layer that lets the owner focus on product quality and copywriting.
Adapting the Mockup to Different Project Types
The same asset behaves differently depending on the context. In a digital product mockup for a landing page, the 3D text may be the primary visual anchor, so you keep the effect prominent. In an email header, the mockup may compete with buttons and links, so you reduce opacity or apply a subtle drop shadow to separate the text from the background. In a printed flyer, the glossy effect may interact with paper finish—coated stock enhances the gloss, while uncoated stock absorbs it, flattening the result. Knowing your output medium lets you adjust the mockup’s layer settings accordingly.
The Sweety 3D Text Effect Mockup Graphic is not a solution for every typography need, but it is a reliable, repeatable tool for scenarios where dimensional text adds value and where consistency across outputs saves time. Integrating it into your workflow means understanding its strengths, respecting its limitations, and building habits around preparation, naming, and version control. When you approach it as a process component rather than a decorative gimmick, it becomes a genuine productivity asset.